Configuring Google Play Services for Multiple Environments (Firebase)
Take full advantage of Google Play Services.
By
Fernando Del Olmo
If you’re a mobile application developer in the gaming space, you are likely trying to figure out how to configure Google Play Services for your mobile app. If so, you may realize that setting up Google Play can be quite confusing, and it is sometimes easy to get lost on the correct and accurate steps to setup GPS for your app. Well, fear not fellow dev friends! This article will show you (step-by-step) how to add Google Play Services into your Mobile App.
Let’s get started!
Creating Your App on Google Play Console
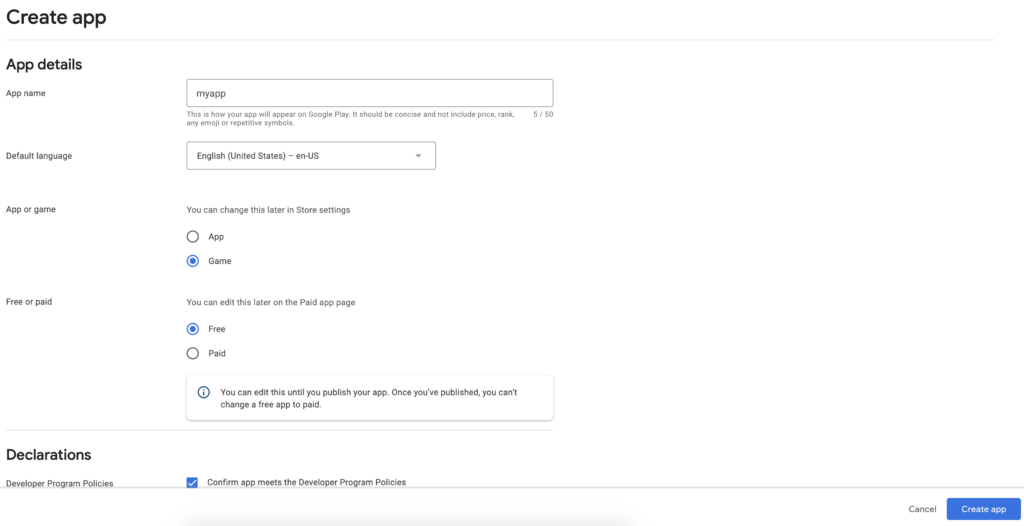
Before you can add Google Play Services, you must first create an application on the Google Play Console which can be found here: https://play.google.com/console
Once at the Play Console, enter the details and click the “Create App” button at the bottom, as shown below.
Adding Play Services to your Application
Now that we’ve created our application, it’s time to add the Play Services configuration. Let’s follow the following steps:
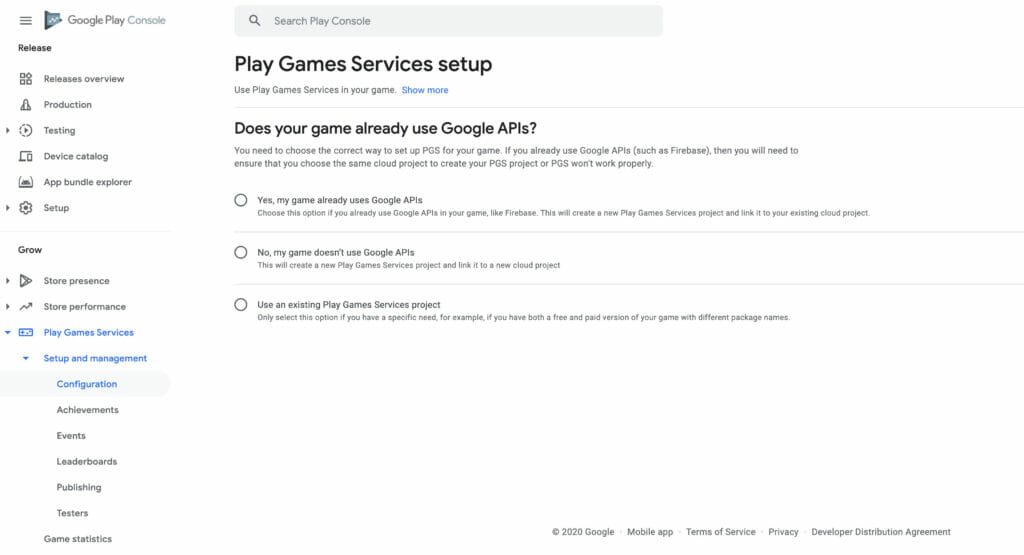
Click on the configuration under Play Games Services / Setup and Management
The first time on this screen, you will see the following 3 options
The first one will create a Play Services project and link it to the selected cloud project on Google Cloud Platform (aka GCP). This one works if you have already a GCP project created that is using Google API’s or a Firebase project since is a GCP project under the hood.
The second one is to create a new Play Services project and a GCP project and link them.
The last one is to re use an existing Play Services project
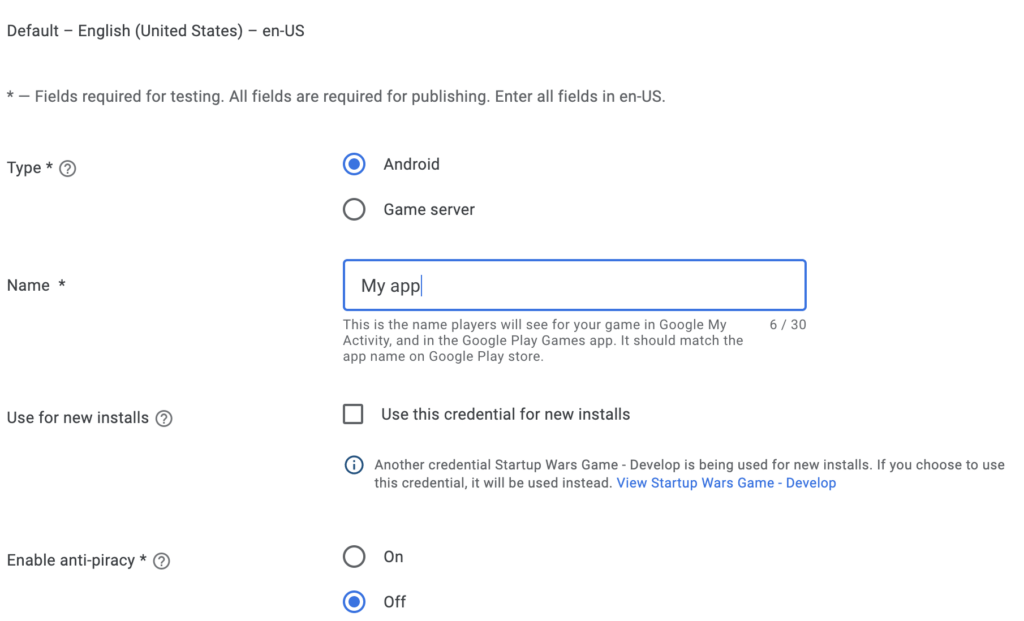
Once linked or created, you will see the option to create credentials. This credentials are in order to let the users login into Play Services.
The first section is a small form to populate with your info (be sure that if it’s for development not check the anti piracy to let people login to play services even not installing through play store)
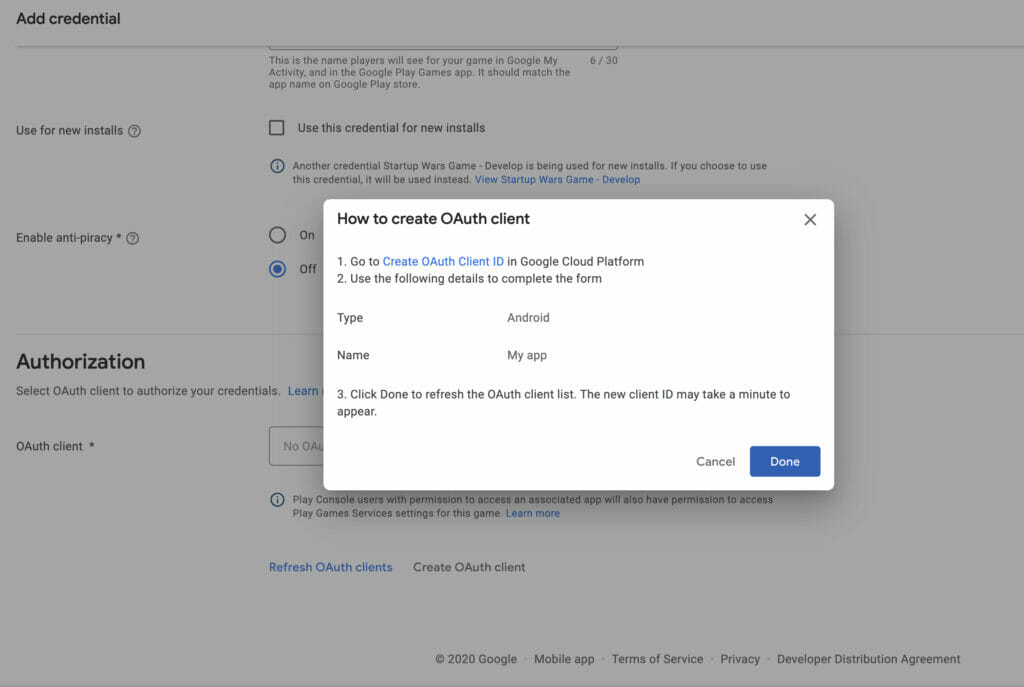
The second part is the important one. Here we need select the credential from the GCP project. Google might create some automatically, but I recommend (to avoid issues) to click on the create OAuth credential to create our own credential based on the key store for this app.
After click on Create OAuth client, there is a popup with details in order to create the OAuth. This info needs to be added when creating the OAuth client
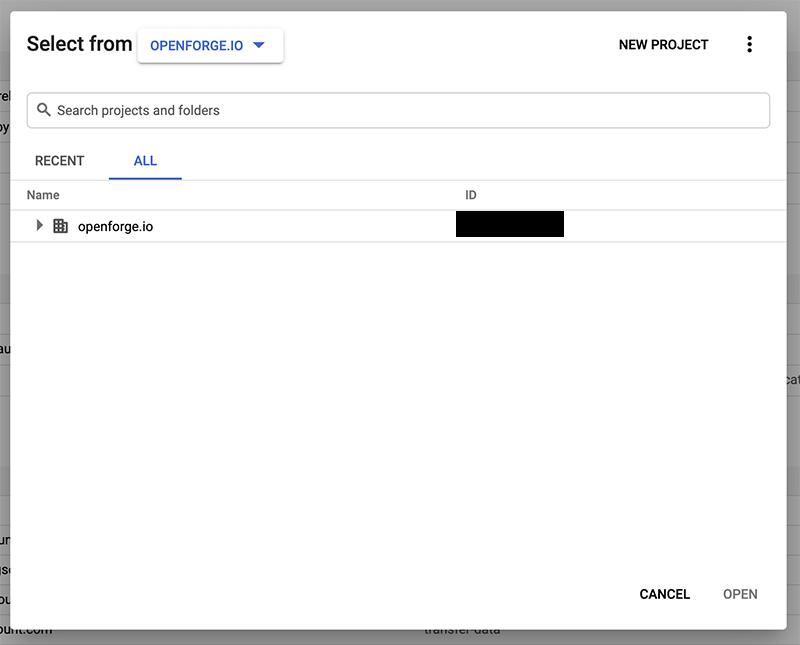
Go to GCP console and go to the linked project. If you have multiple projects you can click at the top (on the current project name) to open a popup to search a project
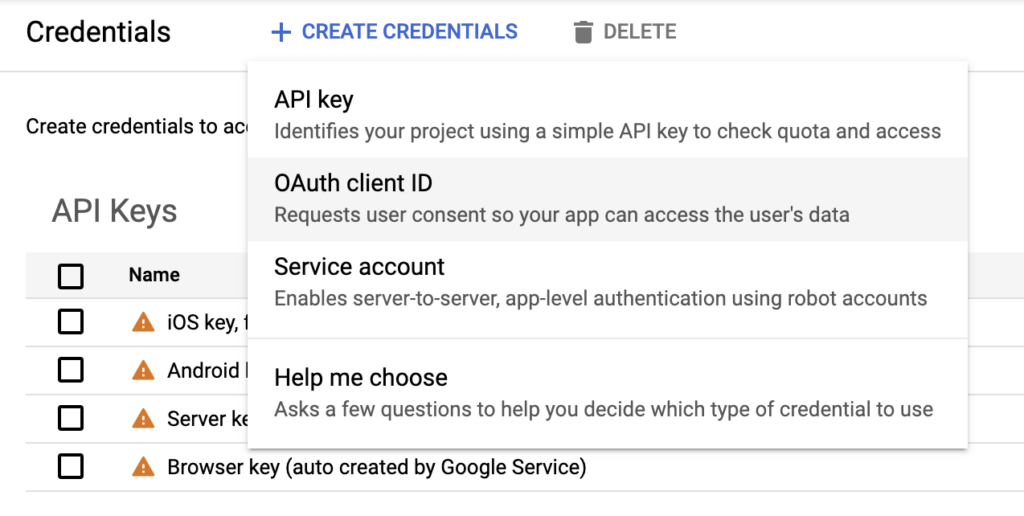
On the credentials page, click on Create Credentials and select OAuth client ID.
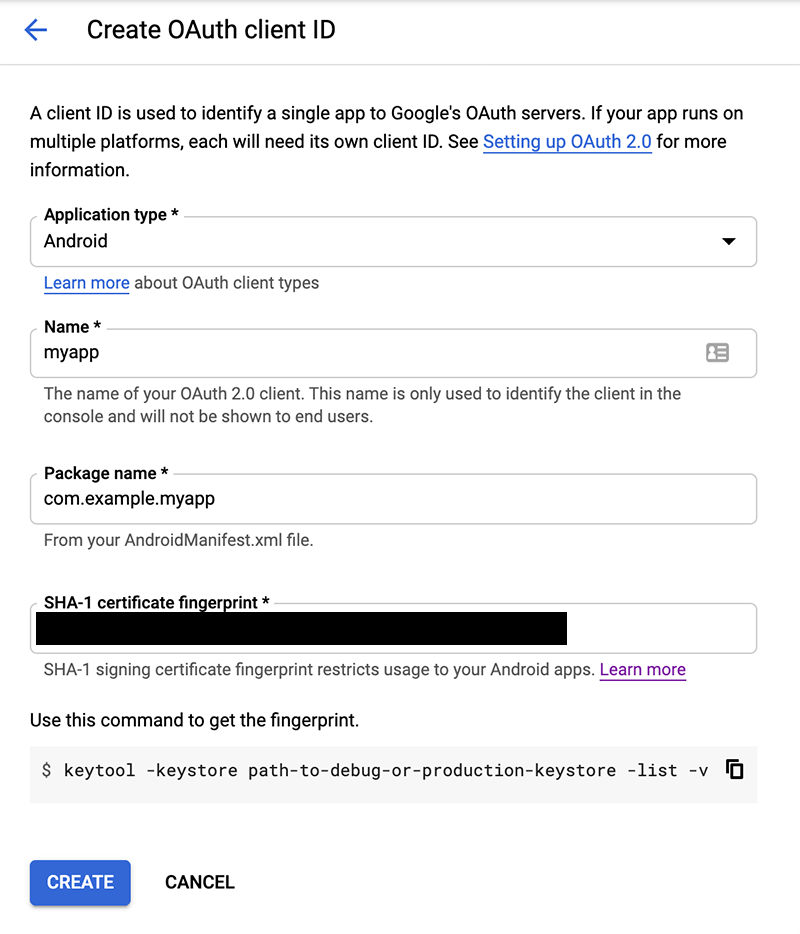
Select the application type (Android for mobile apps), then enter the info from the popup that appeared earlier on Play Services after click on create OAuth
Then add the fingerprint from the key store that is going to be used to sign this app and click on create
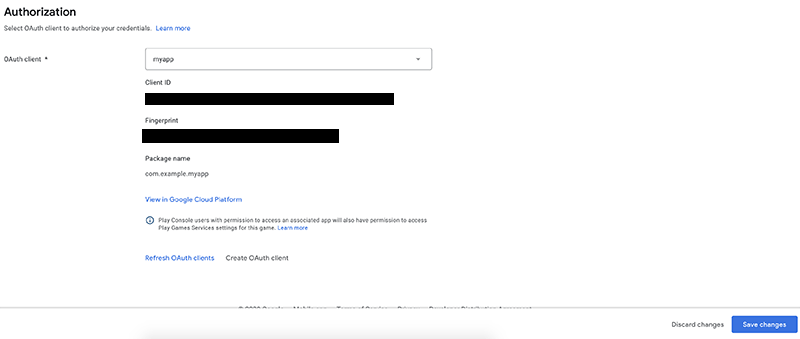
Go back to Play Services credentials and select the recently created OAuth client and click save changes
Keep in mind that after create this credentials, you will see that is a draft. This is in order to let the testers (the emails added, this is covered in the next point) be able to sign in on Play Services. Once going to release the app, first needs to publish the Play Services settings, if not this might cause players who are signing in with non-tester accounts to encounter errors since the app cannot reference the correct game settings.
NOTE: You’ll see “Status” as “Draft” with an arrow next to it.
The last thing to do here is go to the Testers section, select the testers tab and enter all the emails for the people that is going to test the app in order to let them sign in Play Services. If you want enter multiple at same time, just write them all separated by , and space and when adding that, it will go one by one adding them to the list (i.e [email protected], [email protected], [email protected])
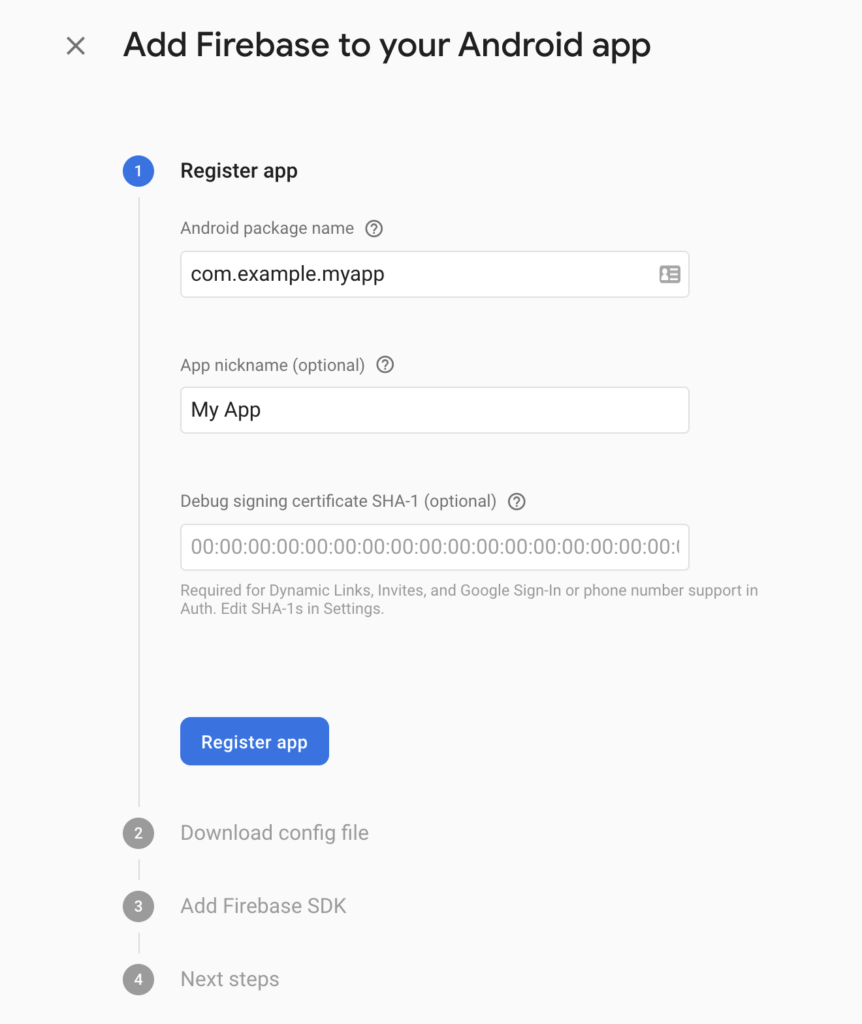
Connecting Your Firebase Project (Optional)
If the project was linked with a Firebase project, there is another step we need to do.
Create an Android app (if not created yet) with the same package name than the one on Play Console.
Once created, you need add the same fingerprint from the OAuth client created on GCP (that is the same that appear in Play Console under Play Services credentials)
Then you need to click “Download the google services json” file and add it to the project (this file use to go under app folder on android)
NOTE: Make sure that the fingerprint is the same in Firebase Android app, Play Services credential and GCP OAuth client.
Some Special Considerations
If you created the app on Play Console with the credential on GCP, but you want link with Firebase after the setup you can.
Go to Firebase console and click on create new Project. There will be a dropdown with the GCP Projects in order to select one or create a new one.
Select the GCP project you want, and the project on Play Console will be linked with Firebase project
In order to prepare this for multiple environments, you need to follow this steps for each individual environment.
This means, if the environments are develop, qa, staging and production: App on Play Console with the Play Service project and credential created for each one environment
A GCP project with its own OAuth credential created for each one environment (or Firebase project since both are GCP projects, once you have a GCP or Firebase project is enough cause are the same)
A key store created to have a different fingerprints for the OAuth client for each one environment
How to Setup Google Play Services with Multiple Environments (dev, staging, production)
In order to prepare this for multiple environments, you need to follow this steps for each individual environment. This means, if the environments are develop, qa, staging and production:
App on Play Console with the Play Service project and credential created for each one environment
A GCP project with its own OAuth credential created for each one environment (or Firebase project since both are GCP projects, once you have a GCP or Firebase project is enough cause are the same)
A key store created to have a different fingerprints for the OAuth client for each one environment
That's it!
If you followed all of the steps above you will be able to successfully configure your Google Play Services with Firebase and GCP, as well as setup multiple environments for your game. If you’re looking for some additional resources, we have some listed below
Discover how to build mobile apps on the modern web.
OpenForge was founded by software & design enthusiasts who believed that software should be created transparently, knowledge should be shared, and that by empowering others to succeed we ourselves succeed.
Receive access to our free guides and resources on building the world’s best mobile applications. Join free to The Mobile Academy