
If you’ve used Firebase to manage and scale your web and mobile applications in the past, then you’ve seen how easy it is to create a backend for your application. It is a great tool that can fully provision authentication, hosting, database, storage, and other features that will help you deploy applications on a serverless environment.
While Firebase is known for its ease of use, there are other platforms out there that share many similar features but have slightly different offerings. AWS Amplify is one of these alternatives. Besides being owned by Amazon, Amplify has the capability to set up dedicated environments for development and production (in Firebase you would have to set up separate projects), connect your project’s repository for continuous deployment, and integrate seamlessly with GraphQL.
To be clear, it is not my intention to declare one platform better than the other. Like most circumstances, it’s about choosing the right tool for the job. By showing you how to get set up with Amplify I hope that you get a chance to compare its features with those of Firebase so that when a new opportunity arises you’ll know which platform to choose. In addition to the features I mentioned above, it’s also important to compare pricing. This can be a little challenging, but luckily Jeff Delaney published a video on his Fireship channel outlining the differences between the two platforms. If you want to learn more about how to choose between the two platforms I encourage you to watch it.
As I mentioned before, Firebase is known for being easy to use. This is an indirect way of stating that AWS can be a little tough to jump into. In the next section I will attempt to fill in some of the gaps that you might notice if you try to follow along the tutorials in the documentation.
Navigating the Tutorial
The Getting Started section of the tutorial starts by making you choose which platform or framework you’d like to use.
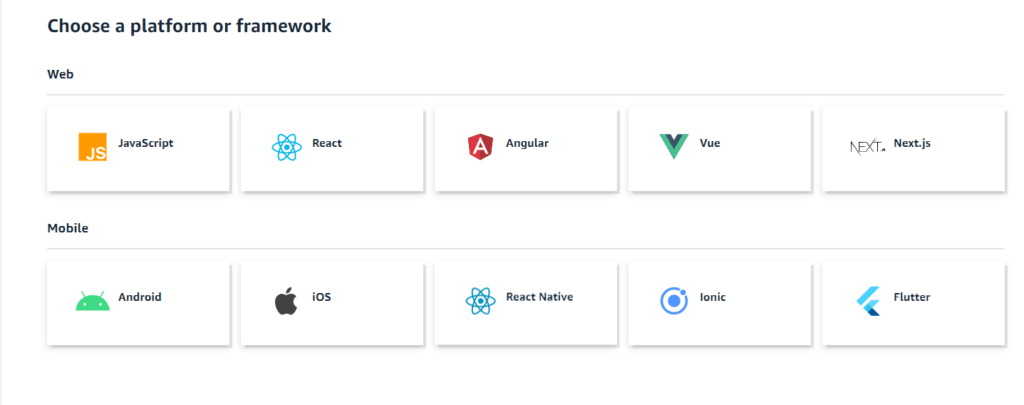
As you can see, there are options for web and mobile frameworks as well as just plain vanilla JavaScript. You’ll notice that Ionic is listed along the other mobile frameworks, while React, Angular, and Vue are on top with the web frameworks. If you’re using Ionic you might be wondering whether you should select the framework you’re using Ionic with, or if you should simply select Ionic as the mobile platform. It’s a rather sensible question, given that you might expect each section to contain instructions tailored specifically to the choice you make. After looking through the tutorial for Ionic, it appears that the documentation assumes that you’ll be using Angular with Ionic, which makes sense when you remember that support for React and Vue was only recently introduced. Nonetheless, the documentation could use some updating. Therefore, if you’re using Ionic, I recommend selecting the web framework of your choice.
I Made a Choice. Now What?

After selecting the framework that you’ll be using, the tutorial can be roughly broken down into three sections: setting up the Amplify CLI, initializing your backend, and using Amplify’s UI components to quickly get up and running. Let’s break down each of these.
Setting Up the Amplify CLI
Aside from the basic prerequisites for setting up a project (Node, npm, and git), the very first step to configure the CLI is to create an AWS Account. While completely free, entering billing information is required to create an AWS account. You can sign up for one here.
After you’ve set up an AWS account, you’ll have to install the Amplify CLI globally. Next you’ll have to set up the CLI so that it is linked to your account. First you’ll get redirected to the AWS console to sign in to your account. Then, you’ll get asked to specify the AWS Region. This step can be a little confusing, so let me share the following excerpt from AWS’s management guide:
“Amazon Web Services run on servers in data centers around the world. Data centers are organized by geographical region. When you launch an Amazon EMR cluster, you must specify a region. You might choose a region to reduce latency, minimize costs, or address regulatory requirements… For best performance, you should launch the cluster in the same region as your data.”
As a rule of thumb, you should select the region that’s closest to your users. Once you’ve specified the region, you’ll get asked to create an IAM user.
“Amazon IAM (Identity and Access Management) enables you to manage users and user permissions in AWS. You can learn more about Amazon IAM here.” – Prerequisites
Due to the multiplicity of services made available through your AWS account — some of which can incur unwanted charges to your account if not managed properly — it’s important to create dedicated users with specific permissions so that you only make available the resources that you’ll need. To create a new user you must go to the Access Management section of the IAM Dashboard. There, go to Users and select “Add user”.
In here you will create a user with AdministratorAccess so that you can provision AWS resources through the CLI. Once the user has been created, simply provide the accessKeyId and the secretAccessKey of the newly created user to the Amplify CLI prompt. Once this is done you’ll be able to set up your app and initialize Amplify.
Initializing Your Backend
Now that the Amplify CLI is configured, you are ready to let Amplify create the required backend services for your app. Depending on which framework you chose, you will need to run some kind of initialization command (i.e. npx create-react-app my-app) to create your app. Once your app is created, you’ll need to navigate to your project’s directory in order to set it up with Amplify. When you run amplify init the CLI will prompt you for some information about your app. The prompts are well documented in the tutorial. My only suggestion is to run your projects build command if you’re unsure what the distribution directory path is (public, build, www, etc.).
After you install the Amplify libraries and copy over the initialization code, every change you make to your backend configuration using the CLI will be reflected in the aws-exports.js file. At this point you’re ready to deploy an API so that you can manipulate data in your application.
Here you have two choices for the API you’re about to create: REST and GraphQl. If you want to get into GraphQl I recommend doing it through the CLI because not only will it generate all the code you need to start interacting with your API locally, but it will also populate the backend with the shape of your data so that you can make CRUD (create, read, update, delete) and list operations.
Adding Authentication
Amplify uses Amazon Cognito as the main authentication provider. Aside from the benefits that you might expect from a fully-managed serverless authentication provider, one of the benefits of authentication with Amplify is that it comes with pre-built UI components that can handle multiple authentication flows such as signUp, signIn, forgotPassword, etc. Often developers have to spend time re-creating these flows and they end up becoming boilerplate. However, you always have the option to manually interact with the Authentication APIs.
Conclusion
After going through the tutorial, I hope that you started to feel comfortable working with AWS. One of the most common complaints from developers is that the number of options available make it hard to understand what exactly it is that you need, especially when a lot of the features look similar. One of the reasons Amplify was created was to address this complaint. Take Authentication for example. While you followed the tutorial you probably wouldn’t have known that you needed Amazon Cognito to manage your user base until I mentioned it. With Amplify, you don’t need to know what AWS services you need because it’s already figured out for you. Ultimately, you were able to add one of the most fundamental features to an app you just created. And just like how you implemented Authentication, you can easily add File Storage, Notifications, Analytics, and many more features with a single CLI command! Now that you’re more comfortable with multiple Serverless solutions, you’ll be able to focus more on the frontend of your applications and provide a greater user experience.
Check out our guide to how to configure Google Play Services with your application:
For more guidance on Mobile Application Development, follow OpenForge on Instagram, Twitter, and Youtube.

