
A/B testing is a powerful methodology that allows you to run experiments by delivering different versions of your application to (randomly or otherwise generated) segments of your user base. It removes guesswork from the process of optimizing your application and enables you to ask questions regarding the behavior of your users. This ultimately empowers you to make data-driven decisions, which ensures that you are always moving in the right direction.
In this article, we’re going to show you a simple way to set up an Ionic application that can deliver different variations to randomly-determined user segments. We’ll be using React as our framework of choice but you are free to use any of the frameworks compatible with Ionic. We’ll also be using Ionic’s Appflow, which we’ll talk more about later.
Note: The Appflow features discussed in this article are not included in the free tier.
Coming Up With Your First Experiment
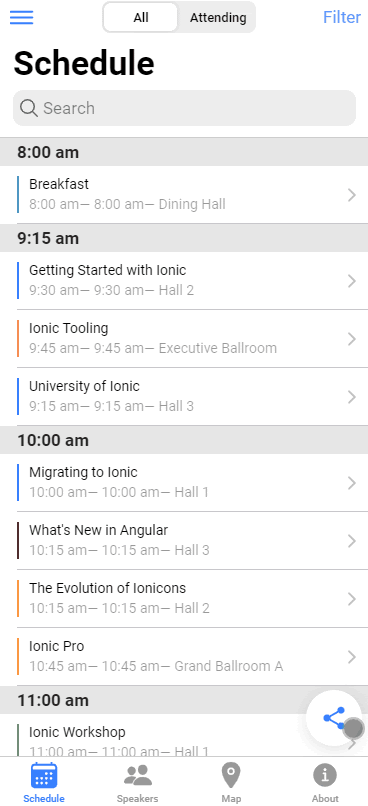
For the purpose of this article, we’ll be using one of Ionic’s starter templates, the Ionic React Conference Application. It is an application full of features that you would find in a real world application. We’ll be running an experiment on a certain feature that allows users to ‘favorite’ a talk by saving it to a list for easy access.
In a real-world scenario, you might be collecting information on users’ favorites in order to estimate attendance for each talk (don’t want event halls getting too crowded!). In this case it might be better to modify this feature so that users actually RSVP to each talk, thereby giving us a more accurate estimate of the expected attendance. This sounds like a good plan, but what if it brings about unintended consequences? For example, imagine that these talks are part of an expo that has other types of events where it is not required to track the estimated attendance. What if the RSVP feature ends up conveying a sense of commitment that deters users from using the feature and going to fewer talks altogether?
This is a valid question, and the best way to answer it is by putting it to the test! Although you are setting up a fairly simple example, once you learn how to set up your application for A/B testing you’ll be able to run experiments on entire pages and even whole user flows!
In the next section, we’ll be including some information on how to get started with the Ionic Framework, but if you’re already familiar with it then feel free to skip ahead to Introducing Appflow.
Getting Started with Ionic
- Before you begin, you’ll want to make sure you have Node.js installed on your computer. If this is your first time working with Ionic check out these instructions to set up your environment.
- Next, install the Ionic CLI with npm.
- npm install -g @ionic/cli
- Now we’re going to initialize the project with the template mentioned above:
- ionic start “A/B Demo” conference –type=react
- Note that I’m using the –type=react flag. We’ll be using React for this demo but you can easily adapt it to whichever framework you’re comfortable with.
Introducing Appflow
In case you’re not already familiar, Appflow is a platform for continuous integration (CI) and continuous deployment (CD) which includes features for generating and distributing native binaries of your applications directly to the Apple and Google App Stores in a fully automated manner. However, one of the most compelling capabilities of Appflow is that it allows you to deploy live updates to your applications in real-time. In this guide, we’ll be leveraging that feature to deliver variants of your application to different segments of your users.
- At this point you should be ready to link our newly-created application with Appflow. If you don’t already have an account with Ionic, go ahead and sign up for one here.
- Next, go over to the ‘Apps’ section of the Ionic dashboard and click on ‘Add App’.
- Choose a name for your app and click on ‘Create app’.
- You should now see a command that you can use to link the app you created. It should look something like this: ionic link <your-app-id>
- Before running this command, make sure you are authenticated with the Ionic CLI by running `ionic login`
- Once you run the `ionic link <your-app-id>` command, you’ll be prompted to make a couple of choices:
- First, Ionic will ask you to choose a git host. If you don’t already have a repository on GitHub, this would be a good opportunity to create one. For the purposes of this demo, we’ll choose Ionic Appflow and we’ll automatically setup a new SSH key pair for Ionic.
Setting Up Your A/B Test
We’ll be working with the Live Update API to install different versions of your app. To use it, all you need to do is install the latest version of the Appflow SDK by following these steps:
- Before installing the Appflow SDK, you’ll need to generate a build by running `npm run build`
- Next, we’re going to add the Appflow SDK by running `ionic deploy add –update-method=none –app-id=”YOUR_APP_ID” –channel-name=”YOUR_CHANNEL_NAME”`
- In order for this to work, it’s important to set the –update-method flag to ‘none’
- For the channel name, you can choose a name that reflects the variant that you want to deliver to your users. For example, you could call one channel ‘FAVORITE’ and another ‘RSVP’. Let’s start by setting the channel name to ‘FAVORITE’.
- Now we’re going to add the logic that determines what version of the app to deliver to the user. Initially, all users will get the same version of the app. Namely, the one containing the favorite feature. This is because you set the channel to ‘FAVORITE’ in the previous step. In order to determine whether or not to switch the channel containing the RSVP feature, you will be using a simple snippet that uses a random number generator to give us a 50/50 probability to call a function that uses the Live Deploy API to change the channel to ‘RSVP’.
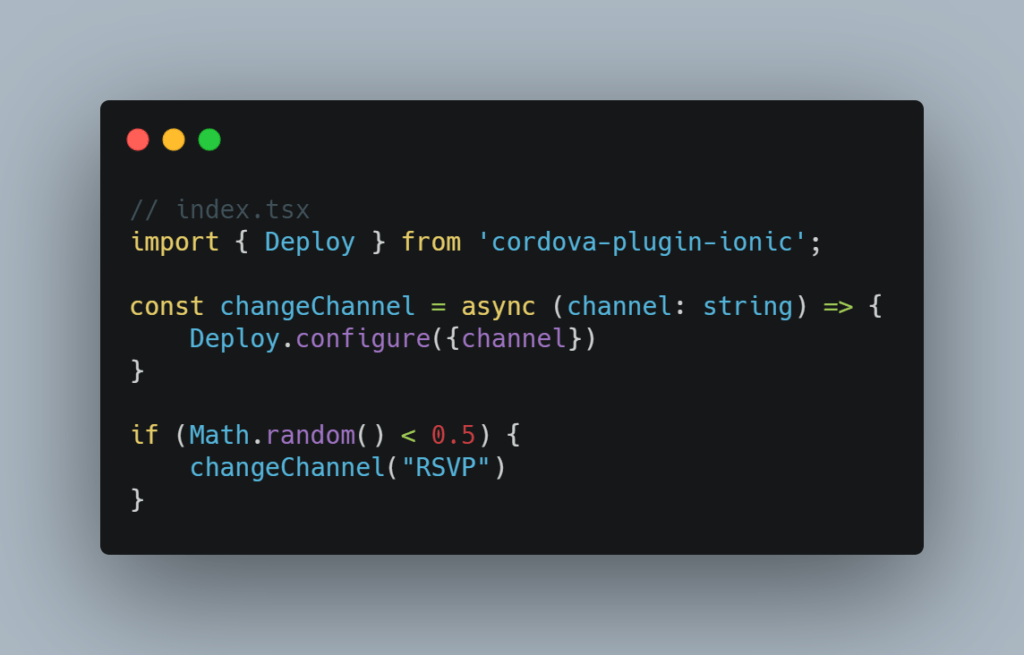
And just like that, you’ve successfully set up your first A/B experiment! When the user first opens the app, this code will be executed, and if the random number generator returns a number higher than 0.5, the app will wait until the application is in the background to install the RSVP version of the app.
Next Steps
Now that you know the basics of A/B testing, you can go further by using Google Analytics to tailor your app’s experience to certain demographics and interest groups. Moreover, you can track several data points from the user’s session in order to generate customized interaction reports that will better inform your decisions. The important thing is that you keep experimenting so that you can deliver the best experience to your users.
Check out our guide to how to incorporate AWS Amplify with Ionic:
For more guidance on Mobile Development, follow OpenForge on Instagram, Twitter, and Youtube.

